Blackberry BBQ Sauce Part 2

0

So it took an extra day to get to try out my blackberry sauce, not to mention have a real dinner.   The last step in making the sauce was to give it another whirl in the blender.  This time ,however, it was cool enough not to explode all over my kitchen, so at least Monday nights fiasco resulted in me becoming a little smarter.  After the last blitz in the blender I strained out all the solids from the pepper and garlic skins from the sauce using my medium fine chinois.

I had some thin cut pork tenderloin in the fridge, so I used some sauce as a marinade and then cooked it stove top and served it over white rice. It gave the meat a nice blackberry-winey flavor. And thickened up nicely over the heat.

20130814-204729.jpg

I’m mostly happy with how it turned out, but I know what I want to change for the next batch.  Flavor wise, this one ended up being a bit more mellow than I was hoping for. Next time I want a little more sweetness and a lot more heat. So although I was originally calling it a BBQ sauce, it really turned out as more of a condiment to meat.  I’m definitely going to pick up some salmon to try it with.

20130814-205928.jpg
Also, side note… Since the sauce is REALLY red, it takes normally pink meat and turns it into murder in a bowl.

20130814-210228.jpg

Blackberry BBQ Sauce

1

My back yard garden hasn’t produced quite like I was hoping it would this year.  However, the blackberry bushes between my house and the parking lot behind my house is proving to be abundantly productive.

20130812-231452.jpg

I’ve gotten a little bored with pies and smoothies and have been looking for some new creative ways to use up the bounty.  Then it came to me, Barbecue Sauce! After consulting several recipes in books, blogs, and of course my Pinterest “Yum” board, I came up with something of my own to bring the right combo of tangy, sweet & spicy to the table.

Ingredient List so far:
4-5 cups blackberries
2-3 cups chicken stock
1 cup bourbon
2 dried guajillo chilies
2 onions
2 small piloncillos
5 cloves garlic
1 tsp smoked sea salt
2 tbsp Worcestershire sauce
4 tbsp apple cider vinegar
1/4 tsp anise seed powder
2 bay leaves

Simmer blackberries, chicken stock & bourbon together till berries break down. Purée berries & juicy goodness and then strain out the seeds.

Btw, it’s important to let the berry mixture cool down before puréeing so YOUR blender doesn’t belch purple hot goo all over like mine did (see below for an exact illustration of what I’m talking about).

Slice up the onion & sauté on medium heat in a large sauce pan with a tablespoon of olive oil till they are translucent. Toss in the guajillo peppers and add the blackberry purée.

Let sauce simmer on medium heat and reduce by a third.

Add in the remainder of the ingredients and let the sauce continue simmering on medium low till thickened. I let it simmer and reduce by another third which on medium low took another two hours.

Tomorrow I’m going to pick up some meat and see how this stuff goes over on various proteins.  At the moment I’m thinking Salmon.  Tune in for BBQ sauce part two!

20130812-233328.jpgThe good news is that much of the simmer time passes in a blink while you crawl around scrubbing blackberry juice off windows, blinds, books, and whatnot.

12 Cups of Pumpkin

0

Currently in my car I have: an immersion blender, Carhart jacket, tennis racket, beach towel, Spanish lesson CD’s and half a bag of trail mix.   Up till yesterday I also was driving around with a rather large pumpkin in the back seat as well.  The pumpkin was abandoned by a tenant at a rental property our company manages.  So it came back to the office with the cleaners and I snagged it.  I figured hey, I like pumpkin… and this is free… so SWEET!

Things got a little more dicey when I got that thing home.  None of my knives would get a grip on sawing the monster in half.  Ever since the watermelon incident of 2005 which involved a serrated blade, a trip to the ER, and several stitches in my thumb, I have not been super excited about the idea of trying to saw through things in the kitchen.   But after sharpening a blade, and giving myself a quick little pep talk, I went after the behemoth.  Eventually I got it all sliced up real nice and I STILL HAVE ALL MY FINGERS!!!  YAY!!!

A couple of hours in the oven, some more handiwork with a knife and I ended up with a crazy big pile of pumpkin.

After processing our grand total came to 12 cups of pumpkin purée.  Which was at once both overwhelming and inspirational.  What could I make with all this pumpkin that would not be boring? and wouldn’t turn Saffer’s & I orange?   Well as of Sunday night here is the breakdown:

  • Approx 2 cups of roasted pumpkin went into Saffer’s kibble… cause it turns out my dog LOVES Pumpkin!
  • 6 cups got reduced down to 4 small jars of pumpkin butter
  • 2 cups pumpkin purée got included with a few other ingredients and turned into pumpkin bread
  • 10 oz of purée were reduced down to 5 oz and was included in pasta dough for pumpkin pasta… which unfortunately did not keep much of the light pumpkin flavor… so I will need to fiddle with that idea.
  • Which leaves me with about 4 cups give or take of purée that went into the freezer and will either become pasta sauce, or ravioli filling, or soup, or custard, or pie…. or… or … or…

However this also made me start thinking about how this gigantic source of FOOD was originally intended as decoration on someones front porch.  It’s hard to pinpoint the number of lbs of pumpkin that the US produces each year.  Most sources speak only in the $$$ value of the crops.  Quoting from AGMRC.org “In 2011, pumpkins were harvested from 47,300 acres from the top six states and were valued at $113 million.”  That is a WHOLE lot of pumpkin my friends!  So don’t just glue mustaches & googly eyes on these gorgeous little gourds (you know who you are), get out your baking dishes and turn them into something really wonderful and nourishing for your family!

And after you are done with all that baking… make sure you guard the cooling racks!

Wild Friday Nights

0

So its another wild & crazy Friday night here in the house of Orn.

Saffers & I are taking a training class from Surf City Dog Training trainer Dina Pavlis on Monday nights.  And in order to not blow my budget this month on healthy training bites I have decided to bake my own.

So in the oven right now is a big pile of beef liver and I certainly hope it is dehydrating… because at the moment its just this giant brown pile of viscous organ meat.  Also drying out in the oven are the actual dog treats that I made too.  The dehydrating liver is more of a “well what should we do with the leftover pile of beef liver” sort of experiment.   For way more dog treat recipe’s and ideas check out The Dog Treat Kitchen, it is where I got the idea for Saffy’s Liver Bites to start with.

Here is the recipe I modified a bit for a more Saffy Friendly Dog treat.

Saffy’s Liver Bites
1 Lb Beef or Chicken Livers
1 cup Oatmeal
1 cup Rice Flour
2/3 cup Oat Flour
2/3 cup Quinoa Flour
3 Tbsp Milk
2 Eggs
2 Tbsp Fresh Parsley
2 Tbsp Dog Pawr Joint & Hip Complex Powder (I have a jar of this in the fridge because Saff wont eat it on her kibble, so this seemed like a good way to use it up and add in some healthy extras to the treats)

In the food processor blend the 1 cup of Oatmeal till finely chopped, then add in all the dry ingredients (flours & Dog Pawr) and then transfer to a separate bowl.

Next in the food processor blend the fresh parsley, eggs & milk.  Add to the dry ingredients.

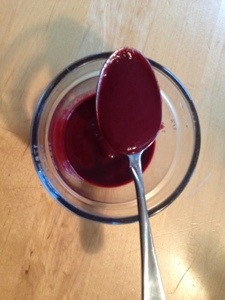
And now the grossest bit… in the food processor liquify the pound of liver till very very smooth.

Add the liver to the other ingredients & blend thoroughly.  The first time I made these treats I used a large frosting bag (which will never ever again hold frosting in it) to pipe out stars on a parchment lined cookie sheet.  This was really cute, but time consuming.  And although I liked how they looked, Saff did not seem to appreciate all the work that went into it.  So this time I decided to go all biscotti-style for the treats and piped long thick lines of the batter onto a parchment lined cookie sheet, and baked them for 20 minutes at 350 degrees till they were set.  Once the strips were baked soft cookie set I took them out of the oven & let them cool down till I could handle them.  Then I used my super sharp knife to cut the strips into bit sized pieces and then put them back into the oven for an additional 20 minutes at 200 degrees to finish drying out.  If you want to get the pieces super dried out & crunchy you can leave them in your oven overnight after you turn it off to completely dry them out.

So far Saffers seems to love them, and chooses them over her other favorite treats.  Its gross, and the smell is less than delicious, but they are healthy, wheat free, and all I had to go buy was the beef liver, which cost me about $2.

Image

And as we all know, making your dog happy is the best way you can spend a Friday night…

even if your house smells like dried out liver for the next week. 

Light and Fluffy Friday

0

Yesterday night I made marshmallows for the first time.

Wow!  Yeah, turns out those are a completely different animal from what we usually buy in the grocery store.   Sorry Kraft, you just lost a customer.

Imagine the texture of the softest marshmallow peep, but not quite as over the top sweet.

Plus this morning as I was dusting with sugar & cutting away to make fun little squares I got to pretend I was an old fashioned candy maker, instead of just an office drone running late to work.   It was a lovely little fantasy while it lasted.

And it really wasn’t very difficult to do either! Just follow Alton’s directions & make sure you have a candy thermometer & something good for dusting sugar.

Pictured above are my home made marshmallows, turned into single bite smores.  Take marshmallow & dunk into melted chocolate & then rest in a tray of graham cracker crumbs.  And if you want to send someone over the edge, just perch one of these on top of a butter-cake cupcake filled with chocolate ganache, and topped with meringue topping that has been toasted with a culinary torch.  Worth ALL the work!  ….  however I neglected to get a photo of the finished product.  DO’H!!!

Let Simple things be Simple

0

Like Vanilla.  Specifically; home made vanilla extract.  I’m sitting here looking at a bottle of clear rum that has about 7 vanilla beans in it.  It also features a label out of masking tape that reads “Use March 2012”.

That is how simple making your own vanilla extract is.  A bottle of booze, vanilla beans, and time.

Granted, not everything can be that simple.  But its amazing how much less complicated things CAN be, especially when you let them.

That is all!